How to use Dabur vatika shampoo

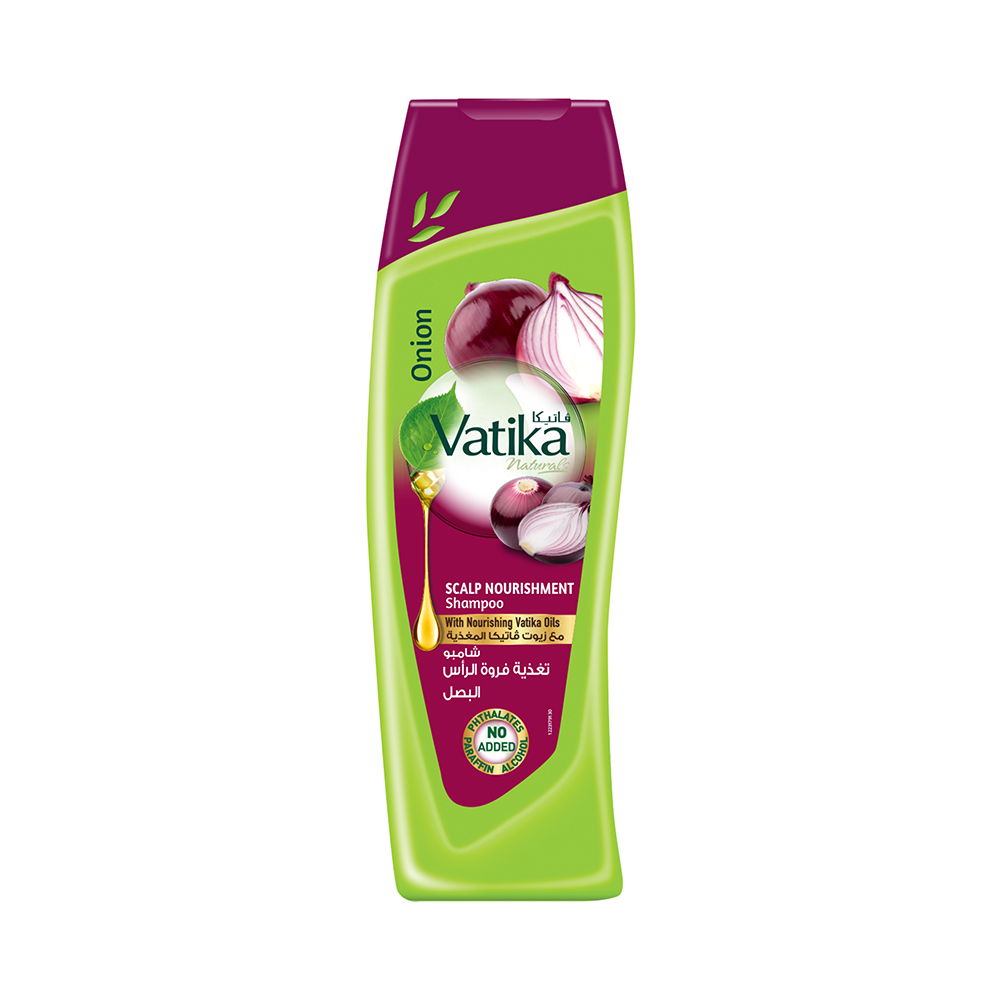
Dabur Vatika Shampoo

 Introduction

Healthy and shiny hair is something everyone desires, but environmental pollution, stress, and improper hair care routines often lead to hair fall, dryness, and dullness. Dabur Vatika Shampoo is a trusted name in herbal hair care that promises nourishment, repair, and protection. Enriched with natural ingredients, it’s designed to address multiple hair concerns while being gentle on the scalp.

Table of Contents

1. Introduction

2. Product Benefits

3. How to Use Dabur Vatika Shampoo

4. Ingredients and Their Benefits

5. Customer Reviews

6. Frequently Asked Questions (FAQs)

7. Conclusion

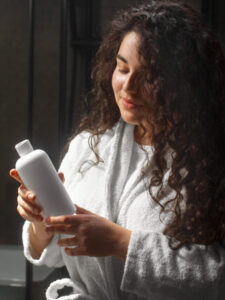
“Herbal ingredients used in Dabur Vatika Shampoo including amla, aloe vera, and henna.”

Product Benefits

✅ Deep Nourishment – Helps to nourish hair from root to tip using natural oils and herbs.

✅ Strengthens Hair – Reduces hair fall and breakage by improving hair health.

✅ Controls Dandruff – Contains ingredients that soothe the scalp and reduce dandruff.

✅ Adds Shine and Softness – Makes hair look glossy, smooth, and manageable.

✅ Prevents Damage – Protects against dryness, split ends, and environmental stressors.

✅ Herbal Formula – Free from harsh chemicals, parabens, and sulfates in many variants.

✅ Suitable for Daily Use – Gentle enough for regular hair care routines.
“Herbal ingredients used in Dabur Vatika Shampoo including amla, aloe vera, and henna.”

How to Use Dabur Vatika Shampoo

1. Wet your hair thoroughly with lukewarm water.

2. Apply a small amount of shampoo on the scalp and hair.

3. Massage gently using fingertips in circular motions to stimulate the scalp and encourage blood circulation.

4. Leave it for 2–3 minutes to let the nutrients work.

5. Rinse thoroughly with water.

6. Repeat if necessary for oily or very dirty hair.

7. For best results, follow with a conditioner from the Vatika range.

Ingredients and Their Benefits
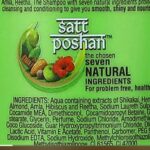
“Herbal ingredients used in Dabur Vatika Shampoo including amla, aloe vera, and henna.”

Ingredient Benefits

Amla (Indian Gooseberry) Rich in vitamin C, strengthens hair roots, promotes growth, and prevents premature graying.
Reetha (Soapnut) Natural cleanser that removes dirt and excess oil without stripping moisture.
Shikakai Enhances hair softness, prevents dandruff, and reduces hair fall.
Henna Repairs damaged hair, adds natural shine, and conditions strands.
Bhringraj Nourishes the scalp and supports hair regrowth while improving texture.
Olive Oil / Coconut Oil (in variants) Deeply hydrates hair, prevents dryness, and smoothens frizz.
Vitamin E Acts as an antioxidant, protecting hair from environmental damage.

Customer Reviews

★★★★★ – “Best Herbal Shampoo!”
“I’ve been using Dabur Vatika Shampoo for over a year. It’s gentle and effective. My hair fall has reduced and my scalp feels refreshed.”

★★★★☆ – “Good for Daily Use”
“The natural ingredients are a bonus. It keeps my hair soft without weighing it down, but I wish it had a stronger fragrance.”

★★★★★ – “Perfect for Oily Hair”
“It cleanses really well and leaves my hair feeling light and fresh throughout the day.”

★★★☆☆ – “Decent but not a miracle”
“I use it because it’s chemical-free, but I didn’t see major hair regrowth. Still, it helps maintain scalp health.”

Frequently Asked Questions (FAQs)

1. Is Dabur Vatika Shampoo suitable for all hair types?
Yes, it is formulated for various hair concerns including dry, oily, normal, and damaged hair.

2. Can I use this shampoo every day?
Yes, it’s gentle and safe for daily use, but using it 3–4 times a week is sufficient for most hair types.

3. Does it contain sulfates or parabens?
Most variants of Dabur Vatika Shampoo are free from sulfates and parabens, making them safe for sensitive scalps.

“Herbal ingredients used in Dabur Vatika Shampoo including amla, aloe vera, and henna.”

4. Will it help with hair fall?
Yes, regular use strengthens hair and reduces breakage, which can help manage hair fall.

5. Can I use it along with other hair treatments?
Absolutely. It works well with conditioners, oils, and other Ayurvedic hair masks.

Conclusion

Dabur Vatika Shampoo is a reliable, herbal solution for people looking to maintain healthy, strong, and shiny hair. With natural ingredients like amla, reetha, shikakai, and bhringraj, it delivers nourishment while gently cleansing the scalp. Whether you’re dealing with hair fall, dandruff, or dryness, this shampoo provides a balanced approach to hair care without harsh chemicals. Regular use helps protect your hair from damage, making it softer, shinier, and healthier over time. If you’re searching for an affordable and effective hair care option, Dabur Vatika Shampoo is definitely worth trying.


How to Use Conditioner Correctly

“Rinse-out conditioner bottle placed in bathroom

Introduction

Hair care is not just about using the right shampoo — it’s also about knowing how to use conditioner correctly. Many people either skip conditioner or apply it the wrong way, which can leave hair greasy, heavy, or lifeless. In reality, conditioner is one of the most important steps in your hair care routine. It helps restore moisture, reduces frizz, protects from damage, and makes your hair soft and manageable. Shampoo cleans the scalp but also removes natural oils, which can make hair dry. Conditioner brings back that hydration, adds shine, and improves overall texture. Whether you have curly, straight, oily, or dry hair, applying conditioner properly can make a big difference in the health of your hair. In this blog, we’ll guide you step by step on how to use conditioner correctly, common mistakes to avoid, and tips for choosing the right type of conditioner for your hair.

Step by step guide on how to use conditioner correctly”

Why Conditioner is Essential for Hair Health

Many people underestimate the role of conditioner, but it is more than just a “bonus” step after shampooing. Conditioner is designed to:

  • Restore lost moisture after shampooing.

  • Protect the hair cuticle from damage.

  • Make detangling easier and prevent breakage.

  • Reduce frizz and improve manageability.

  • Add shine and softness.

  • Create a protective layer against pollution, sun, and heat styling.

Without conditioner, your hair may feel dry, rough, and prone to tangling. Over time, this can lead to breakage, split ends, and dullness.

Step by step guide on how to use conditioner correctly”

Types of Conditioners

Before learning how to use conditioner correctly, it’s important to understand the different types available:

1. Rinse-Out Conditioner

  • The most common type.

  • Applied after shampoo and rinsed out after 2–5 minutes.

  • Ideal for everyday use.

2. Leave-In Conditioner

  • Lightweight formula that stays in the hair.

  • Provides ongoing hydration and protection throughout the day.

  • Great for curly, dry, or frizzy hair.

3. Deep Conditioner or Hair Mask

  • Rich, intensive treatment.

  • Used once a week or biweekly.

  • Helps repair damage, dryness, or color-treated hair.

4. Co-Wash (Conditioner Wash)

  • A cleansing conditioner designed for those who skip shampoo.

  • Popular for curly or textured hair to prevent dryness.

“Rinse-out conditioner bottle placed in bathroom

How to Use Hair Serum for Women: A Complete Guide

Step-by-Step Guide: How to Use Conditioner Correctly

Step 1: Wash Your Hair with Shampoo

Always begin with shampoo to remove oil, dirt, and buildup. Conditioner works best on clean hair because it can penetrate the strands more effectively.

Step 2: Squeeze Out Excess Water

After rinsing out shampoo, gently squeeze water out of your hair. Overly wet hair will dilute the conditioner, reducing its effectiveness.

Step 3: Take the Right Amount

  • Short hair: a coin-sized amount.

  • Medium-length hair: two coin-sized amounts.

  • Long or thick hair: a palm-sized amount.

Using too much can make hair greasy, while too little won’t give enough hydration.

Step 4: Apply to Mid-Lengths and Ends

Avoid the scalp (unless you’re using a scalp-specific conditioner). Focus on the mid-lengths and ends where hair is driest and most damaged.

Step 5: Distribute Evenly

Use your fingers or a wide-tooth comb to spread conditioner evenly through your hair. This ensures every strand is coated.

Step 6: Let It Sit

Leave the conditioner on for 2–5 minutes for rinse-out types, or as directed. Deep conditioners may require 10–20 minutes. This allows the product to absorb properly.

Step 7: Rinse Thoroughly

Rinse with lukewarm or cool water. Hot water can strip moisture, while cool water seals the cuticle and adds shine.

How Often Should You Use Conditioner?

  • Daily: If you have dry, curly, or frizzy hair.

  • Every wash: For normal to slightly oily hair.

  • Once or twice a week: For very fine or oily hair (use lightweight formulas).

Consistency matters. Skipping conditioner too often can lead to dryness and long-term damage.

Common Mistakes When Using Conditioner

  1. Applying to the Scalp – This can make hair greasy and weigh it down.

  2. Using Too Much Product – Leads to buildup and heaviness.

  3. Rinsing Too Quickly – Not giving conditioner time to work.

  4. Not Rinsing Enough – Leaving residue that causes dullness.

  5. Using the Wrong Formula – Lightweight vs. rich conditioners matter depending on hair type.

How to use conditioner correctly for shiny healthy hair

Choosing the Right Conditioner for Your Hair Type

For Fine or Oily Hair

  • Use lightweight, volumizing formulas.

  • Avoid heavy creams and oils.

For Dry or Damaged Hair

  • Choose rich, moisturizing conditioners with shea butter, keratin, or argan oil.

  • Deep condition weekly.

For Curly or Frizzy Hair

  • Go for hydrating and anti-frizz conditioners.

  • Leave-in products work well for defining curls.

For Color-Treated Hair

  • Use color-safe conditioners.

  • Look for UV protection and strengthening ingredients.

Benefits of Using Conditioner Correctly

  • Softer, shinier hair.

  • Reduced breakage and split ends.

  • Easier detangling.

  • Protection against styling tools.

  • Long-term improvement in hair strength and elasticity.

Expert Tips for Maximum Results

  • Always comb conditioner through with a wide-tooth comb.

  • Alternate between rinse-out and deep conditioner for best results.

  • Don’t skip conditioner, even if your hair is oily — just use a lightweight version.

  • Apply leave-in conditioner before heat styling for protection.

  • Use sulfate-free shampoos to retain conditioner’s benefits longer.

Frequently Asked Questions (FAQ) About Using Conditioner

1. Can I use conditioner every day?

Yes, you can use a lightweight conditioner daily, especially if your hair is dry, curly, or frizzy. For oily or fine hair, stick to every wash or 2–3 times a week.

2. Should I apply conditioner on the scalp?

No, unless it’s a scalp-specific conditioner. Regular conditioner should be applied only to the mid-lengths and ends to avoid greasiness.

3. How long should I leave conditioner in my hair?

Leave regular conditioner for 2–5 minutes. Deep conditioners or masks should stay for 10–20 minutes, depending on the product instructions.

4. Can conditioner damage my hair?

No, but overusing or not rinsing properly can cause buildup, making hair look greasy or heavy.

5. What’s the difference between conditioner and hair mask?

Conditioner is for everyday use, while a hair mask is a deep treatment used once a week for extra nourishment and repair.

6. Is leave-in conditioner the same as regular conditioner?

No. Leave-in conditioner is lightweight and designed to stay in your hair, while rinse-out conditioner must be washed off.

7. Do men need to use conditioner?

Yes! Conditioner is important for all hair types and genders. It keeps hair soft, manageable, and prevents dryness.

8. Can I skip shampoo and only use conditioner?

Yes, this is called “co-washing,” popular for curly or textured hair. However, shampooing is still necessary occasionally to remove buildup.

9. What type of conditioner is best for oily hair?

Choose lightweight, volumizing conditioners that won’t weigh hair down. Avoid heavy creams or oils.

10. Should I rinse conditioner with cold or warm water?

Use lukewarm or cool water. Warm water opens the cuticle, and cool water helps seal it, locking in shine and moisture.

Conclusion

Conditioner isn’t just an optional step — it’s essential for maintaining strong, shiny, and healthy hair. By understanding your hair type, choosing the right product, and applying it correctly, you can transform your hair care routine. Remember: focus on the mid-lengths and ends, leave it on long enough to absorb, and rinse properly. Whether you have fine, oily, curly, or color-treated hair, conditioner will keep your strands nourished and protected. With the right technique, your hair will not only look better but also stay healthier in the long run.


How to Use Shampoo or Conditioner

Introduction

We all dream of glossy, silky, and manageable hair. But here’s the shocking truth— most people don’t know how to use shampoo or conditioner properly. That’s why even after buying expensive hair care products, your hair often looks dull, frizzy, or lifeless.

The way you wash your hair directly impacts your hair health. If done wrongly, it can lead to dryness, dandruff, hair fall, and split ends. If done correctly, it can transform your hair into something that looks like it just came out of a salon session.

How to Use Shampoo or Conditioner

In this detailed guide, we will uncover:

  • The right way to shampoo your hair

  • How to use conditioner for maximum results

  • Common mistakes and myths that damage your hair

  • Smart tips professionals follow (and don’t tell you!)

  • How to choose shampoo and conditioner for your specific hair type

By the end of this blog, you’ll know exactly how to give your hair the care it deserves.

1. Why Shampoo Alone Is Not Enough

Shampoo is essential for cleaning, but that’s just half the story. Shampoo removes dirt, sweat, oils, and product build-up from the scalp. Without shampoo, your scalp pores clog and cause dandruff or excessive oil.


Charcoal face wash se kya hota hai 

But there’s a hidden problem: shampoo alone also strips away natural oils. This is where conditioner comes to your rescue. Conditioner rehydrates, smoothens, and protects your hair shaft after the cleansing process.

⚡Golden rule:
Shampoo = Cleansing. Conditioner = Protection. You need both!

2. How to Use Shampoo (Step-by-Step)

Step 1: Wet Your Hair Properly

Always start with lukewarm water. It opens hair cuticles, loosening dirt and oil. Avoid hot water—it dries out your hair.

Step 2: Dilute Shampoo Before Applying

Never pour shampoo straight onto your scalp. Instead, take a coin-sized amount, mix it with water in your palm, and then apply. This ensures even spread and prevents product overload.

Step 3: Focus on the Scalp, Not the Ends

Massage shampoo gently into the scalp only. Your scalp produces oils, while your ends simply collect buildup. Ends will get cleaned naturally when you rinse.

How to Use Shampoo or Conditioner

Step 4: Gentle Massage, No Scratching

Use your fingertips (not nails) in circular motions. Scratching the scalp can cause micro-cuts and irritation.

Step 5: Rinse Thoroughly

Shampoo residue left behind = dandruff, itchiness, and hair fall. Always rinse until your hair feels squeaky clean.

How to use face wash for oily skin


3. How to Use Conditioner (Step-by-Step)

Step 1: Remove Excess Water

After shampooing, squeeze out extra water. Conditioner works best when hair is damp, not dripping wet.

How to Use Shampoo or Conditioner

Step 2: Apply from Mid-Length to Ends

Never apply conditioner to the scalp—it can clog pores and make the scalp greasy. Start from mid-length and apply until the tips.

Step 3: Leave It On for 2–3 Minutes

Allowing the conditioner to absorb gives your hair maximum hydration.

Step 4: Rinse with Cold Water

Cold water helps seal the cuticle, locking in shine and smoothness.

4. Common Mistakes People Make

Here are the most damaging mistakes that are ruining your hair every wash day:

  • Using too much shampoo, thinking “more means cleaner”

  • Skipping conditioner or using it only once in a while

  • Applying conditioner on the scalp instead of hair lengths

  • Washing with hot water daily

  • Washing hair every day (bad for scalp health)

  • Using shampoo + conditioner 2-in-1 products (they rarely work effectively!)

5. How Often Should You Wash Your Hair?

  • Oily hair/scalp: Every alternate day

  • Normal hair: 2–3 times a week

  • Dry/curly hair: Once or twice a week

👉 Remember: By over-washing, you strip natural oils. By under-washing, you risk buildup and dandruff. Balance is the key.

How to Use Shampoo or Conditioner

6. Choosing the Right Shampoo & Conditioner

  • Dry & Damaged Hair → Moisturizing shampoo + Hydrating conditioner (look for shea butter, argan oil)

  • Oily Scalp → Gentle clarifying shampoo + Lightweight conditioner

  • Dandruff/Itchy Scalp → Anti-dandruff shampoo (zinc, ketoconazole) + Calming conditioner

  • Colored or Treated Hair → Sulfate-free shampoo + Color-protect conditioner

Always check labels. Avoid shampoos loaded with harsh sulfates, parabens, and too much silicone.

7. Myths Busted!

❌ Myth 1: Conditioner causes hair fall.
✔️ Truth: Conditioner on the scalp can, but when used only on lengths, it actually strengthens hair.

❌ Myth 2: Shampoo daily keeps hair healthy.
✔️ Truth: Daily shampoo strips oils, weakening roots.

❌ Myth 3: Any shampoo is okay for everyone.
✔️ Truth: Hair needs differ—choose products based on scalp and hair type.

❌ Myth 4: Cold water alone can clean your hair.
✔️ Truth: Hair needs proper cleansing agents (shampoo).

8. Bonus Pro Tips (Salon Secrets!)

  • Always comb hair before shampooing to reduce tangling.

  • Double shampoo if you have heavy styling product buildup.

  • Add a deep conditioning mask once a week for extra hydration.

  • Finish washing with a cold rinse for glossy shine.

  • Pat dry with a microfiber towel instead of rubbing aggressively.

Conclusion

Your hair is your crown—and you wear it every day. Learning how to use shampoo or conditioner correctly can completely transform the health and beauty of your hair.

To recap:

  • Shampoo is for cleansing, conditioner is for protection.

  • Focus shampoo on the scalp, conditioner on the lengths.

  • Avoid hot water, over-washing, and product misuse.

  • Choose products based on YOUR hair type, not someone else’s.

Follow these steps, avoid the common mistakes, and you’ll notice a dramatic change. Your hair will feel softer, shinier, and healthier—exactly what you’ve always wanted.


charcoal face wash se kya hota hai full details

Charcoal face wash se kya hota hai

Charcoal Face Wash  Kya Ye Skin ke Liye Useful Hai?

🌟 Introduction_

Skincare ke world me ek ingredient bahut zyada popular ho raha hai – Charcoal Face Wash. Har brand apni product range me ise include kar raha hai aur log bhi isse use karne ke liye excited hote hain. Lekin asli sawal ye hai ki Charcoal Face Wash lagane se skin par kya असर होता है?

Charcoal, especially Activated Charcoal, apni absorbing power ke liye famous hai. Ye skin ke pores ke andar ghus kar dust, oil aur pollution particles ko kheench kar nikal deta hai. Isi wajah se ise “skin detoxifier” bhi kaha jata hai, kyunki ye skin ko deeply clean karke fresh aur glowing banata hai.

Charcoal face wash bottle for deep cleansing and glowing skin"

🧴 Charcoal Face Wash Kya Hota Hai?

Charcoal Face Wash ek cleanser hai jisme Activated Charcoal particles mix hote hain. Activated charcoal ko high heat se process karke banaya jata hai jisse iski surface bahut porous (छिद्रदार) ho jaati hai.

Ye pores ek magnet ki tarah kaam karte hain aur skin ke andar se:

Excess Oil

Dead Skin Cells

Pollution ke particles

Dirt & Impurities

sabhi ko attract karke skin ko clean kar dete hain.

🌟 Charcoal Face Wash ke Major Benefits

1. Excess Oil Control kare
Oily skin walo ke liye best – ye face se extra oil ko absorb karke skin ko oil-free aur fresh banata hai.

2. Deep Cleansing kare
Ye sirf upar se hi nahi balki pores ke andar tak ghus kar impurities ko unclog karta hai.

Charcoal face wash se kya hota hai

3. Acne aur Pimples kam kare
Jab pores clean rahte hain to pimples aur blackheads naturally kam ho jaate hain. Acne-prone skin ke liye helpful hai.

4. Pollution Protection
Roz ka pollution skin par chipak jata hai, charcoal face wash ise detoxify karke clear kar deta hai.

5. Instant Freshness & Glow
Use karne ke turant baad skin clean, smooth aur glowing lagti hai.

6. Blackheads aur Whiteheads ko Reduce kare
Charcoal impurities ko soften karke blackheads aur whiteheads ko remove karne me help karta hai.

7. Skin Detoxifier
Ek natural detox agent hone ki wajah se ye skin ko andar se saaf karta hai.

8. Unisex Product
Men aur women dono ke liye equally effective hai.

9. Skin Balance kare
Agar sahi formulation use ho to dryness kam hoti hai aur skin hydrated feel karti hai.

10. Daily Skincare Routine me Fit
Din me ek ya do baar use karne par skin naturally healthy dikhti hai.

Charcoal face wash se kya hota hai

https://cosmeticgyaan.com/%f0%9f%a7%bc-clean-and-clear-face-wash-lagane-se-kya-hota-hai/

🧼 Charcoal Face Wash Kaise Use Karein?

1. Sabse pehle face ko halka sa paani se wet karein.

2. Palm par thoda sa face wash nikaal kar face par lagayein.

3. Gentle circular motion me 30 seconds tak massage karein.

4. T-zone aur nose area par extra focus karein (yaha oil zyada hota hai).

5. Normal paani se wash karke soft towel se pat dry karein.

6. Dry skin wale log turant moisturizer apply karein.

Charcoal face wash se kya hota hai


👉 Best results ke liye ise subah aur raat ko use karna sahi hai.

⚠️ Charcoal Face Wash Use Karne Ki Savdhaniyan

Dry skin walo ke liye roz use karna suitable nahi, week me 3–4 baar hi best hai.

Sensitive skin par use karne se pehle patch test zaroor karein.

Overuse na karein, warna skin ke natural oils bhi nikal jaate hain.

Ye product kids ke liye recommended nahi hai.

Charcoal face wash se kya hota hai

❓ FAQs – Frequently Asked Questions

Q1. Kya Charcoal Face Wash oily skin ke liye best hai?
👉 Haan, ye excess oil ko remove karke skin ko fresh aur balanced banata hai.

Q2. Dry skin wale ise use kar sakte hain?
👉 Haan, lekin limited use karein aur moisturizer ka sath lena zaroori hai.

Q3. Kya pimples completely thik ho jaate hain isse?
👉 Ye pimples ko kam karta hai, lekin severe acne me dermatologist ki salah lena zaroori hai.

Q4. Kya Charcoal Face Wash daily use ho sakta hai?
👉 Oily skin walo ke liye daily use safe hai, lekin dry skin walo ke liye alternate days better hain.

Q5. Kya men bhi ise use kar sakte hain?
👉 Bilkul! Ye unisex product hai jo har skin type ke liye beneficial ho sakta hai.

Charcoal face wash se kya hota hai
💧 “Glow ka Secret — Top 10 Cosmetic Face Wash jo karein Deep Clean & Skin Bright!”

📝 Conclusion

Charcoal Face Wash ek powerful natural cleanser hai jo skin se oil, dirt aur pollution ko nikal kar face ko fresh aur glowing banata hai. Agar aapki skin oily ya acne-prone hai to ye aapke skincare routine ka best part ban sakta hai.

Bas dhyaan rakhein – apni skin type ke hisaab se use karein. Oily skin ke liye daily use best hai, par dry aur sensitive skin ke liye limited usage hi safe hai.

👉 Agar aapko pollution aur oil se skin dull lagti hai, to Charcoal Face Wash ek perfect solution ho sakta hai.

How to Use Face Wash for Oily Skin

Introduction

Oily skin is one of the most common skin types, yet also one of the trickiest to manage. If you have oily skin, you’re probably familiar with problems like excess shine, clogged pores, acne breakouts, and an uneven complexion. While genetics and lifestyle play a role, the foundation of clear and balanced skin starts with the right cleansing routine.

Using a face wash specifically designed for oily skin can make a world of difference. Unlike regular soap or random cleansers, a proper face wash helps remove excess oil, dirt, and impurities without stripping away your skin’s natural moisture barrier. But here’s the catch—many people don’t know how to use face wash correctly, which often leads to dryness, irritation, or even more oil production.

This guide will walk you through everything you need to know about using face wash for oily skin—from why it matters to step-by-step instructions, expert tips, and the best skincare practices to keep your skin fresh, healthy, and shine-free.

What Is Face Wash and Why It Matters for Oily Skin

A face wash is a specially formulated cleanser designed to clean your facial skin gently but effectively. Unlike harsh soaps that can disrupt your skin’s natural balance, a face wash is milder, pH-balanced, and often enriched with ingredients tailored to different skin concerns.

For oily skin, face washes are designed to:

  • Remove excess sebum (oil).

  • Prevent clogged pores and breakouts.

  • Keep skin feeling fresh without over-drying.

  • Maintain the skin’s natural protective barrier.

Why You Shouldn’t Use Regular Soap on Oily Skin

One of the most common mistakes people with oily skin make is using regular bar soap. While it may give a “squeaky clean” feeling, it actually harms your skin in the long run.

Here’s why soap is bad for oily skin:

  • High pH (9–10): Disrupts skin’s natural pH (4.5–6.5).

  • Over-drying effect: Strips natural oils, causing skin to produce even more oil.

  • Irritation: Can lead to redness, tightness, and sensitivity.

  • Breakouts: Harsh ingredients may trigger acne.

On the other hand, a good oily-skin face wash maintains balance while tackling excess oil gently.

Types of Face Wash for Oily Skin

When choosing a face wash, it’s important to know the different types available:

1. Foaming Face Wash

  • Creates a light lather.

  • Best for very oily and acne-prone skin.

  • Helps deep clean pores.

2. Gel-Based Face Wash

  • Lightweight and refreshing.

  • Controls oil without over-drying.

  • Ideal for daily use.

3. Exfoliating Face Wash

  • Contains small beads or acids (like salicylic acid).

  • Removes dead skin cells and unclogs pores.

  • Use only 2–3 times a week to avoid irritation.

4. Clay or Charcoal Face Wash

  • Absorbs excess oil.

  • Detoxifies skin by drawing out impurities.

  • Great for evening use.

Step-by-Step Guide: How to Use Face Wash for Oily Skin

Step 1: Prepare Your Skin

  • Wash your hands to avoid transferring bacteria.

  • Splash your face with lukewarm water (not hot, not cold).

Step 2: Apply the Face Wash

  • Squeeze a pea-sized amount onto your palm.

  • Rub your hands gently to activate the formula.

Step 3: Massage Gently

  • Using fingertips, massage in circular motions.

  • Focus on oily areas like the T-zone (forehead, nose, chin).

  • Avoid scrubbing too hard—it can irritate your skin.

Step 4: Rinse Thoroughly

  • Rinse with lukewarm water until all product is gone.

  • Make sure no residue remains, especially around the nose and jawline.

Step 5: Pat Dry

  • Use a clean, soft towel.

  • Gently pat—don’t rub—to avoid irritation.

Step 6: Follow Up with Moisturizer

  • Always use an oil-free, non-comedogenic moisturizer.

  • Moisturizing prevents over-drying and controls oil production.

Important Tips for Oily Skin Care

1. Wash Twice a Day

Over-washing can strip your skin and increase oil production. Stick to morning and night cleansing.

2. Use Lukewarm Water

Hot water strips natural oils, while cold water doesn’t cleanse properly. Lukewarm water is ideal.

3. Don’t Over-Exfoliate

Exfoliation is good but too much can irritate oily skin. Limit to 2–3 times a week.

4. Choose Oil-Free Products

Look for labels like “oil-free,” “non-comedogenic,” and “mattifying.”

5. Avoid Touching Your Face

Hands carry bacteria and oils that can worsen acne and shine.

How to Choose the Right Face Wash for Oily Skin
  • For Acne-Prone Skin: Choose a face wash with salicylic acid or benzoyl peroxide.

  • For Sensitive Oily Skin: Go for fragrance-free, sulfate-free cleansers.

  • For Dull Oily Skin: Try a face wash with vitamin C or mild exfoliants.

  • For Men with Oily Skin: Men often have thicker, oilier skin—so gel-based or foaming cleansers work best.

http://L: /face-wash-for-acne

Common Myths About Oily Skin and Face Wash

Myth 1: “Oily skin doesn’t need moisturizer.”

❌ Wrong! Skipping moisturizer can actually trigger your skin to produce even more oil to make up for lost hydration. The key is to use a lightweight, oil-free moisturizer.

Myth 2: “The harsher the cleanser, the better.”

❌ No. Harsh cleansers strip away your skin’s natural protective oils, leading to dryness, irritation, and even more breakouts.

Myth 3: “If I wash my face more often, my skin will be less oily.”

❌ Over-washing has the opposite effect. When you wash too often, your skin compensates by producing even more oil, which can clog pores and worsen acne.

Myth 4: “Face wash alone can cure oily skin problems.”

❌ Not true. While a face wash is essential for managing excess oil, it cannot solve oily skin on its own. A complete routine with moisturizer, sunscreen, and healthy lifestyle choices is necessary for long-term results.

Myth 5: “Natural oils on the skin are always bad.”

❌ False. Your skin’s natural oils help protect and hydrate your skin. The goal of a face wash is not to remove all oil, but to balance it so your skin stays healthy without becoming greasy.

Lifestyle Habits That Support Oil Control

  • Diet: Avoid excessive fried foods; eat more fruits and vegetables.

  • Hydration: Drink at least 8 glasses of water daily.

  • Sleep: Poor sleep increases stress and oil production.

  • Exercise: Sweating helps detoxify pores, but always wash your face after workouts.

Conclusion

Managing oily skin doesn’t have to be complicated. The key is to use a gentle yet effective face wash that removes excess oil without damaging your skin’s barrier. By following the correct technique—preparing your skin, applying the right amount, massaging gently, rinsing well, and moisturizing—you can maintain a fresh, balanced, and shine-free complexion.

Pair this with healthy lifestyle choices and the right skincare products, and your oily skin will not only look better but also feel healthier.

Remember: Consistency is everything. Stick to a proper routine, and you’ll notice the difference in just a few weeks.

क्रीम लगाने से क्या फायदे होते हैं?

Acne Glow Lotion

हर कोई चाहता है कि उसकी त्वचा साफ, मुलायम और ग्लोइंग दिखे। लेकिन प्रदूषण, धूप, तनाव और बदलते मौसम के कारण त्वचा की देखभाल बेहद जरूरी हो जाती है।
स्किन केयर में क्रीम (Moisturizer, Sunscreen, Night Cream, Day cream, Lotion आदि) का अहम रोल है। सही क्रीम लगाने से न सिर्फ त्वचा हाइड्रेट रहती है बल्कि कई स्किन प्रॉब्लम्स से भी बचाव होता है।

चेहरे पर क्रीम लगाने के फायदे"

क्रीम लगाने के मुख्य फायदे

1. त्वचा में नमी बनाए रखना

क्रीम लगाने से स्किन ड्राई नहीं होती और त्वचा मुलायम बनी रहती है।

2. प्रदूषण और धूप से सुरक्षा

क्रीम त्वचा पर एक परत बना देती है, जिससे धूल, धूप और प्रदूषण से बचाव होता है।

3. मेकअप के लिए बेस्ट बेस

मॉइस्चराइज़र मेकअप प्रोडक्ट्स लगाने से पहले एक स्मूद बेस देता है।

4. एंटी-एजिंग में मददगार

एंटी-एजिंग क्रीम झुर्रियों और फाइन लाइन्स को कम करने में सहायक होती है।

https://cosmeticgyaan.com/niacinamide-in-skincare-benefits-uses-and-side-effects/

5. सन प्रोटेक्शन

सनस्क्रीन क्रीम UV किरणों से बचाव करती है और टैनिंग व स्किन कैंसर का खतरा कम करती है।

6. दाग-धब्बों में कमी

कई क्रीम्स पिगमेंटेशन, डार्क स्पॉट और मेलाज्मा जैसी समस्याओं में मदद करती हैं।

स्किन केयर रूटीन में क्रीम की भूमिका

🕙 डे-टाइम रूटीन

सुबह चेहरा धोकर हल्की मॉइस्चराइज़र लगाएं।

SPF 30+ सनस्क्रीन जरूर लगाएं।

🌙 नाइट-टाइम रूटीन

रात को चेहरा धोकर नाइट क्रीम लगाएं जिसमें हायल्यूरोनिक एसिड, सेरामाइड्स या पैप्टाइड्स हों।

यह स्किन रिपेयर और डीप हाइड्रेशन देती है।

👀 आई क्रीम

डार्क सर्कल और पफीनेस कम करने के लिए आई क्रीम इस्तेमाल करें।

✨ एक्सफोलिएशन और फेस ऑयल

हफ्ते में 2-3 बार स्क्रब करें।

जरूरत पड़ने पर हल्का फेस ऑयल लगाएं।

त्वचा के प्रकार अनुसार सही क्रीम

ड्राई स्किन

मोटी, ऑयल-बेस्ड क्रीम चुनें।

विटामिन E और सेरामाइड्स वाले प्रोडक्ट्स फायदेमंद।

ऑयली स्किन

ऑयल-फ्री, जेल बेस्ड या वाटर बेस्ड मॉइस्चराइज़र चुनें।

संवेदनशील त्वचा

बिना खुशबू और केमिकल वाली हल्की क्रीम लगाएं।

पैच टेस्ट जरूर करें।

पिंपल्स/एक्ने वाली त्वचा

नॉन-कॉमेडोजेनिक (पोर्स ब्लॉक न करने वाली) क्रीम लगाएं।

क्रीम लगाने के घरेलू उपाय

एलोवेरा जेल – त्वचा को ठंडक व हाइड्रेशन देता है।

बेसन, हल्दी, दही, ओट्स पैक – नेचुरल ग्लो के लिए।

पपीता और आलू का पैक – दाग-धब्बे और टैनिंग हटाने के लिए।

ग्रीन टी पैक – एंटीऑक्सीडेंट गुणों के लिए।

क्रीम लगाने के नुकसान (Side Effects)

गलत क्रीम से पिंपल्स और एक्ने बढ़ सकते हैं।

केमिकल वाली क्रीम से एलर्जी, जलन या लालिमा हो सकती है।

स्टेरॉयड वाली क्रीम से त्वचा पतली और डार्क हो सकती है।

डॉक्टर की सलाह के बिना दवा-बेस्ड क्रीम का इस्तेमाल न करें।

क्रीम चुनते समय ध्यान देने की बातें

अपनी स्किन टाइप के अनुसार क्रीम चुनें।

Ingredients और Expiry Date जरूर देखें।

नया प्रोडक्ट लगाने से पहले Patch Test करें।

गर्मी में हल्की और सर्दी में थोड़ी मोटी क्रीम चुनें।

बच्चों और बुजुर्गों के लिए mild व hypoallergenic क्रीम लें।

अक्सर पूछे जाने वाले सवाल (FAQ)

Q1. क्रीम कब लगानी चाहिए?
👉 सुबह नहाने के बाद और रात को सोने से पहले।

Q2. क्या क्रीम से गोरे हो सकते हैं?
👉 क्रीम से नेचुरल ग्लो और रंगत निखर सकती है, पर स्थायी गोरेपन का दावा झूठा है।

Q3. ऑयली स्किन वालों के लिए कौन सी क्रीम सही है?
👉 ऑयल-फ्री और वॉटर बेस्ड क्रीम।

Q4. नाइट क्रीम कितनी जरूरी है?
👉 नाइट क्रीम स्किन रिपेयर और डीप मॉइस्चराइजिंग में मदद करती है।

निष्कर्ष

क्रीम लगाना स्किन केयर का जरूरी हिस्सा है। लेकिन हर क्रीम हर किसी के लिए सही नहीं होती। हमेशा अपनी त्वचा के प्रकार और मौसम के अनुसार क्रीम चुनें।
सही स्किन केयर रूटीन + हेल्दी डाइट + पानी + घरेलू उपाय = ग्लोइंग और हेल्दी स्किन।

भारतीय त्वचा के लिए होममेड फेस पैक क्यों जरूरी हैं?

भारत में गर्मी, धूल, प्रदूषण, और नमी त्वचा को नुकसान पहुंचाती है। बाजार में उपलब्ध केमिकल-लोडेड प्रोडक्ट्स अक्सर भारतीय त्वचा के लिए उपयुक्त नहीं होते, जिससे एलर्जी या मुंहासे हो सकते हैं। होममेड फेस पैक प्राकृतिक सामग्रियों से बने होते हैं, जैसे हल्दी, बेसन, दही, और शहद, जो त्वचा को पोषण देते हैं और इसे चमकदार बनाते हैं। ये सस्ते, आसानी से उपलब्ध, और हर त्वचा प्रकार के लिए अनुकूल हैं।

भारतीय त्वचा के लिए होममेड फेस पैक रेसिपी, प्राकृतिक सामग्री से चमकती त्वचा।"

5 बेस्ट होममेड फेस पैक रेसिपी भारतीय त्वचा के लिए

1. हल्दी और दही से फेस पैक (ऑयली स्किन के लिए)
सामग्री: 1 चम्मच हल्दी, 2 चम्मच दही, 1 चम्मच नींबू का रस।
तैयारी: सभी सामग्रियों को मिलाकर एक पेस्ट बनाएं।
लगाने का तरीका: इसे चेहरे और गर्दन पर 15-20 मिनट तक लगाएं, फिर गुनगुने पानी से धो लें।
फायदा: हल्दी एंटी-बैक्टीरियल होती है, दही त्वचा को हाइड्रेट करती है, और नींबू तेल को नियंत्रित करता है। यह मुंहासों से छुटकारा दिलाता है।
उपयोग की आवृत्ति: हफ्ते में 2 बार।

2. बेसन और गुलाब जल फेस पैक (नॉर्मल टू कॉम्बिनेशन स्किन के लिए)
सामग्री: 2 चम्मच बेसन, 1 चम्मच गुलाब जल, 1 चम्मच शहद।
तैयारी: सामग्रियों को मिलाकर गाढ़ा पेस्ट बनाएं। अगर जरूरत हो तो थोड़ा पानी डालें।
लगाने का तरीका: 15 मिनट तक लगाएं और ठंडे पानी से धोएं।
फायदा: बेसन डेड स्किन हटाता है, गुलाब जल त्वचा को तरोताजा करता है, और शहद नमी देता है।
उपयोग की आवृत्ति: हफ्ते में 1-2 बार।


3. ओटमील और दूध फेस पैक (ड्राई स्किन के लिए)
सामग्री: 1 चम्मच ओटमील, 2 चम्मच दूध, 1 चम्मच बादाम का तेल।
तैयारी: ओटमील को दूध में भिगोएं, बादाम का तेल मिलाएं, और पेस्ट बनाएं।
लगाने का तरीका: 20 मिनट तक लगाएं और गुनगुने पानी से धोएं।
फायदा: ओटमील स्क्रब की तरह काम करता है, दूध नमी देता है, और बादाम का तेल त्वचा को मुलायम बनाता है।
उपयोग की आवृत्ति: हफ्ते में 2 बार।
4. चंदन और केसर फेस पैक (सेंसिटिव स्किन के लिए)
सामग्री: 1 चम्मच चंदन पाउडर, 2-3 केसर की कतरन, 1 चम्मच गुलाब जल।
तैयारी: केसर को गुलाब जल में भिगोएं, फिर चंदन पाउडर मिलाकर पेस्ट बनाएं।
लगाने का तरीका: 15 मिनट तक लगाएं और ठंडे पानी से धोएं।
फायदा: चंदन त्वचा को शांत करता है, और केसर रंगत निखारता है। यह संवेदनशील त्वचा के लिए सुरक्षित है।
उपयोग की आवृत्ति: हफ्ते में 1 बार।
5. नीम और एलोवेरा फेस पैक (एक्ने-प्रोन स्किन के लिए)
सामग्री: 1 चम्मच नीम पाउडर, 1 चम्मच एलोवेरा जेल, 1 चम्मच शहद।
तैयारी: सभी सामग्रियों को मिलाकर चिकना पेस्ट बनाएं।
लगाने का तरीका: 15-20 मिनट तक लगाएं और ठंडे पानी से धोएं।
फायदा: नीम एंटी-बैक्टीरियल है, एलोवेरा त्वचा को ठंडक देता है, और शहद घाव भरने में मदद करता है।
उपयोग की आवृत्ति: हफ्ते में 2 बार।

भारतीय त्वचा के लिए होममेड फेस पैक के अतिरिक्त फायदे

प्राकृतिक पोषण: केमिकल्स से मुक्त होने के कारण ये त्वचा को नुकसान नहीं पहुंचाते और विटामिन्स व एंटीऑक्सिडेंट्स प्रदान करते हैं।
किफायती: बाजार के प्रोडक्ट्स से सस्ते हैं और लंबे समय तक इस्तेमाल किए जा सकते हैं।
कस्टमाइज़ेशन: अपनी त्वचा के प्रकार के अनुसार सामग्रियां चुन सकते हैं, जैसे शुष्क त्वचा के लिए दूध और तैलीय त्वचा के लिए नींबू।
पर्यावरण-अनुकूल: प्लास्टिक पैकेजिंग से बचाव होता है, जो पर्यावरण के लिए लाभकारी है।
लंबे समय के लाभ: नियमित उपयोग से त्वचा की चमक और स्वास्थ्य में सुधार होता है, साथ ही उम्र बढ़ने के संकेतों को कम करता है।
स्ट्रेस रिलीफ: फेस पैक लगाने की प्रक्रिया रिलेक्सिंग होती है, जो मानसिक शांति देती है।
इम्यूनिटी बूस्ट: हल्दी और नीम जैसे तत्व त्वचा की रक्षा प्रणाली को मजबूत करते हैं।
डार्क सर्कल्स कम करना: दही और खीरे का उपयोग डार्क सर्कल्स को हल्का करने में मदद करता है।
स्किन टोन इवेनिंग: केसर और चंदन त्वचा के रंग को समान बनाते हैं।
पोर्स को साफ करना: बेसन और ओटमील पोर्स से गंदगी हटाते हैं, जिससे त्वचा सांस लेती है।

Conclusion

भारतीय त्वचा लगातार गर्मी, धूल, प्रदूषण और नमी जैसी चुनौतियों का सामना करती है। ऐसे में होममेड फेस पैक न सिर्फ सुरक्षित और केमिकल-फ्री विकल्प होते हैं, बल्कि त्वचा को पोषण, निखार और प्राकृतिक सुरक्षा भी प्रदान करते हैं। हल्दी, बेसन, दही, एलोवेरा जैसी पारंपरिक सामग्रियाँ त्वचा को भीतर से स्वस्थ रखती हैं और लंबे समय तक ग्लो बनाए रखती हैं। इसलिए भारतीय त्वचा के लिए घरेलू फेस पैक अपनाना न सिर्फ एक ब्यूटी रिचुअल है, बल्कि स्वस्थ और प्राकृतिक स्किनकेयर की ज़रूरत भी है।


क्लेंजर लगाने का सही तरीका: चमकती त्वचा

आज की भागदौड़ भरी जिंदगी में त्वचा की देखभाल करना हर किसी के लिए जरूरी हो गया है। प्रदूषण, धूल-मिट्टी, और मेकअप के कारण हमारी त्वचा रोजाना कई तरह के नुकसान झेलती है। ऐसे में क्लेंजर त्वचा की देखभाल का सबसे पहला और महत्वपूर्ण कदम है। लेकिन क्या आप जानते हैं कि क्लेंजर लगाने का सही तरीका क्या है? अगर नहीं, तो यह ब्लॉग आपके लिए है! इस ब्लॉग में हम आपको क्लेंजर लगाने का सही तरीका, इसके फायदे, और कुछ जरूरी टिप्स बताएंगे, जो आपकी त्वचा को चमकदार और स्वस्थ बनाएंगे।

Cleanser uses and benifits

क्लेंजर क्या है और यह क्यों जरूरी है?

क्लेंजर एक ऐसा स्किनकेयर प्रोडक्ट है, जो त्वचा से गंदगी, तेल, मेकअप, और डेड स्किन सेल्स को हटाने में मदद करता है। यह आपकी त्वचा को साफ करता है और उसे अगले स्किनकेयर स्टेप्स, जैसे टोनर और मॉइश्चराइजर, के लिए तैयार करता है। अगर आप क्लेंजर का इस्तेमाल नहीं करते, तो त्वचा के पोर्स में गंदगी जमा हो सकती है, जिससे मुंहासे, ब्लैकहेड्स, और त्वचा की रंगत फीकी पड़ने जैसी समस्याएं हो सकती हैं।
क्लेंजर न केवल त्वचा को साफ करता है, बल्कि यह त्वचा के प्राकृतिक तेलों को संतुलित रखता है और उसे हाइड्रेटेड रखने में मदद करता है। लेकिन इसका पूरा फायदा तभी मिलता है, जब आप इसे सही तरीके से लगाते हैं। तो आइए जानते हैं कि क्लेंजर लगाने का सही तरीका क्या है।

क्लेंजर लगाने का सही तरीका: स्टेप-बाय-स्टेप गाइड

क्लेंजर को सही तरीके से लगाने के लिए नीचे दिए गए स्टेप्स को फॉलो करें। यह तरीका सरल है और इसे रोजाना अपनाकर आप अपनी त्वचा को स्वस्थ और चमकदार बना सकते हैं।
1. सही क्लेंजर चुनें
क्लेंजर लगाने से पहले यह जरूरी है कि आप अपनी त्वचा के प्रकार के अनुसार सही क्लेंजर चुनें। त्वचा मुख्य रूप से चार प्रकार की होती है:
ऑयली त्वचा: फोमिंग या जेल-बेस्ड क्लेंजर चुनें, जो अतिरिक्त तेल को नियंत्रित करे।
ड्राई त्वचा: क्रीम-बेस्ड या मॉइश्चराइजिंग क्लेंजर उपयुक्त है, जो त्वचा को रूखा होने से बचाए।
कॉम्बिनेशन त्वचा: हल्का फोमिंग या जेल क्लेंजर जो टी-जोन के तेल को नियंत्रित करे और गालों को हाइड्रेट रखे।
सेंसिटिव त्वचा: सुगंध-मुक्त और जेंटल क्लेंजर चुनें, जिसमें अल्कोहल या कठोर केमिकल्स न हों।
अपने डर्मेटोलॉजिस्ट से सलाह लें या प्रोडक्ट लेबल पढ़कर यह सुनिश्चित करें कि क्लेंजर आपकी त्वचा के लिए उपयुक्त है।
2. चेहरा गीला करें
क्लेंजर लगाने से पहले अपने चेहरे को गुनगुने पानी से गीला करें। गुनगुना पानी त्वचा के पोर्स को खोलता है, जिससे क्लेंजर गहराई तक काम कर पाता है। बहुत गर्म पानी का इस्तेमाल न करें, क्योंकि यह त्वचा को रूखा कर सकता है।
3. उचित मात्रा में क्लेंजर लें
हाथों में सिक्के के आकार जितना क्लेंजर लें। ज्यादा मात्रा में क्लेंजर का उपयोग करने से त्वचा रूखी हो सकती है, और कम मात्रा से पूरी सफाई नहीं हो पाती। हल्के हाथों से क्लेंजर को अपनी हथेलियों के बीच रगड़ें ताकि यह फोम बन जाए (अगर यह फोमिंग क्लेंजर है)।
4. चेहरे पर लगाएं और मसाज करें
क्लेंजर को अपने चेहरे और गर्दन पर हल्के हाथों से गोलाकार गति में लगाएं। खास तौर पर टी-जोन (माथा, नाक, और ठुड्डी), गाल, और चिन पर ध्यान दें। इन जगहों पर गंदगी और तेल सबसे ज्यादा जमा होते हैं। मसाज करने से क्लेंजर त्वचा के अंदर तक जाता है और गंदगी को बाहर निकालता है। इसे 30-60 सेकंड तक करें, लेकिन ज्यादा जोर से रगड़ें नहीं, वरना त्वचा में जलन हो सकती है।
5. अच्छे से धो लें
क्लेंजर को गुनगुने पानी से अच्छी तरह धो लें। सुनिश्चित करें कि चेहरे पर क्लेंजर का कोई अवशेष न रहे, खासकर बालों की जड़ों और जबड़े की रेखा के पास। बचे हुए क्लेंजर से त्वचा में जलन या मुंहासे हो सकते हैं।
6. त्वचा को सुखाएं
साफ और मुलायम तौलिये से चेहरे को हल्के हाथों से थपथपाकर सुखाएं। तौलिये को चेहरे पर रगड़ें नहीं, क्योंकि इससे त्वचा में खिंचाव और जलन हो सकती है।
7. स्किनकेयर रूटीन को पूरा करें
क्लेंजर के बाद त्वचा को टोनर, सीरम, और मॉइश्चराइजर से हाइड्रेट करें। अगर आप दिन में क्लेंजर का इस्तेमाल कर रहे हैं, तो सनस्क्रीन लगाना न भूलें। यह आपकी त्वचा को सूरज की हानिकारक किरणों से बचाएगा।

https://cosmeticgyaan.com/%e0%a4%b0%e0%a5%87%e0%a4%9f%e0%a4%bf%e0%a4%a8%e0%a5%89%e0%a4%b2-%e0%a4%b8%e0%a5%80%e0%a4%b0%e0%a4%ae-%e0%a4%95%e0%a5%8d%e0%a4%af%e0%a4%be-%e0%a4%b9%e0%a5%88/

क्लेंजर लगाने की आवृत्ति
क्लेंजर का इस्तेमाल दिन में दो बार करना सबसे अच्छा होता है:
सुबह: रात में त्वचा पर जमा हुए तेल और पसीने को हटाने के लिए।
रात: दिनभर की गंदगी, मेकअप, और प्रदूषण को हटाने के लिए।
अगर आपकी त्वचा बहुत रूखी है, तो रात में ही क्लेंजर का उपयोग करें और सुबह केवल गुनगुने पानी से चेहरा धोएं।
क्लेंजर लगाने की गलतियां जो आपको बचना चाहिए
क्लेंजर का सही तरीके से इस्तेमाल करने के लिए कुछ सामान्य गलतियों से बचना जरूरी है:
गलत क्लेंजर का उपयोग: अपनी त्वचा के प्रकार के हिसाब से क्लेंजर न चुनना त्वचा को नुकसान पहुंचा सकता है।
ज्यादा क्लेंजर का उपयोग: जरूरत से ज्यादा क्लेंजर त्वचा के प्राकृतिक तेल छीन सकता है।
अधूरी सफाई: क्लेंजर को पूरी तरह न धोने से त्वचा में जलन हो सकती है।
रगड़ना: बहुत जोर से मसाज करने से त्वचा में खिंचाव आ सकता है।
क्लेंजर छोड़ना: अगर आप मेकअप हटाने के लिए केवल माइसेलर वॉटर का उपयोग करते हैं, तो भी डबल क्लींजिंग के लिए क्लेंजर का उपयोग करें।
क्लेंजर के फायदे
गंदगी और तेल हटाता है: क्लेंजर त्वचा से अतिरिक्त तेल, धूल, और प्रदूषण को हटाता है।
मुंहासों को रोकता है: पोर्स को साफ रखकर यह मुंहासों और ब्लैकहेड्स को कम करता है।
त्वचा को हाइड्रेट रखता है: सही क्लेंजर त्वचा को रूखा होने से बचाता है।
मेकअप हटाने में मदद: यह मेकअप और सनस्क्रीन को पूरी तरह हटाता है।
त्वचा को तरोताजा बनाता है: क्लेंजर त्वचा को साफ और ताजा महसूस कराता है।
क्लेंजर चुनते समय ध्यान देने योग्य बातें
सामग्री जांचें: सैलिसिलिक एसिड (ऑयली त्वचा के लिए), हायल्यूरोनिक एसिड (हाइड्रेशन के लिए), या एलोवेरा (सेंसिटिव त्वचा के लिए) जैसे इंग्रेडिएंट्स देखें।
केमिकल-फ्री: कठोर केमिकल्स जैसे सल्फेट्स और पैराबेन्स से बचें।
पैच टेस्ट: नए क्लेंजर को पहले हाथ पर टेस्ट करें ताकि एलर्जी का पता चल सके।
ब्रांड की विश्वसनीयता: अच्छे और विश्वसनीय ब्रांड का क्लेंजर चुनें।
घरेलू क्लेंजर के विकल्प
अगर आपके पास क्लेंजर नहीं है, तो आप कुछ घरेलू विकल्प आजमा सकते हैं:
शहद और दूध: शहद और दूध मिलाकर एक प्राकृतिक क्लेंजर बनाएं। यह ड्राई त्वचा के लिए अच्छा है।
एलोवेरा जेल: यह सेंसिटिव त्वचा को साफ और हाइड्रेट करता है।
दही और नींबू: दही में नींबू की कुछ बूंदें मिलाकर ऑयली त्वचा के लिए क्लेंजर बनाएं।
हालांकि, घरेलू क्लेंजर का उपयोग करने से पहले डर्मेटोलॉजिस्ट से सलाह लें।

1 Raat Me Pimple Kaise Hataye? (Natural Remedies + Dermatologist Tips)

Intro

Pimples ek aisi problem hai jo kisi ko bhi kabhi bhi face karni pad sakti hai. Sabse badi dikkat tab hoti hai jab kal aapki important meeting ho, shaadi function ho ya college ka fresher party aur raat ko hi ek bada pimple nikal aaye 😟. Us waqt har koi Google pe search karta hai – “1 raat me pimple kaise hataye?”

Sach yeh hai ki ek raat me pimple ko poori tarah se gayab karna mushkil hai, lekin swelling, redness aur pain ko kaafi had tak control kiya ja sakta hai. Is blog me hum baat karenge:

Pimples kyu hote hain

Ghar ke natural remedies jo overnight kaam karte hain

Dermatologist recommended treatments

Diet aur lifestyle tips jo future pimples ko rok sakte hain

FAQs jo log frequently search karte hain

Chaliye step by step samajhte hain 👇

Pimples Kyu Hote Hain? (Causes of Pimples)

Pimples random nahi aate, inke peeche kuch common wajah hoti hain:

1. Excess Oil (Sebum Production):
Jab skin ke oil glands zyada active ho jaate hain, toh pores block ho jaate hain aur pimples nikal aate hain.

2. Dead Skin Cells:
Jab dead skin properly remove nahi hoti toh wo pores ko clog kar deti hai.

3. Bacteria (P. acnes):
Yeh bacteria clogged pores me grow karke pimples banata hai.

4. Hormonal Changes:
Puberty, stress, periods ya unhealthy lifestyle ke wajah se hormones imbalance hote hain aur acne trigger hota hai.

5. Improper Skincare & Makeup:
Galat products use karna, dirty makeup brushes aur oily creams bhi acne ka reason hain.

1 Raat Me Pimple Kaise Kam Karein? (Natural Remedies)

Natural remedies safe hote hain aur side-effects ka risk kam hota hai. Agar aapko mild pimples hain toh yeh remedies aapke kaam aayengi.

1. Ice Therapy

Ek ice cube ko cotton cloth me wrap karein.

2–3 minutes ke liye pimple par gently press karein.

Yeh swelling aur redness ko turant reduce karega.

👉 Pro Tip: Direct ice ko skin par mat lagaiye, warna skin burn ho sakti hai.

2. Aloe Vera Gel

Fresh aloe vera gel nikalein ya market ka pure aloe vera gel use karein.

Directly pimple par lagakar raat bhar chhod dein.

Isme anti-bacterial aur anti-inflammatory properties hoti hain.

👉 Aloe vera oily aur sensitive skin ke liye best hai.

3. Haldi (Turmeric) Paste

Haldi + Gulabjal (rose water) milakar ek paste bana lein.

Pimple par thin layer lagayein.

Haldi ke curcumin compound bacteria ko kill karta hai.

👉 Isse overnight chhodne se redness kam ho jaati hai.

4. Honey Spot Treatment

Raw organic honey ka ek drop pimple par lagayein.

Honey ek natural antiseptic hai jo infection ko control karta hai.

Subah tak pimple flat lagne lagega.


5. Green Tea Compress

Used green tea bag ko fridge me thanda karein.

Usse pimple par press karein.

Green tea ke antioxidants pimples ko calm karte hain.


6. Neem Paste

Neem ke patte ko grind karke paste bana lein.

Pimples par lagakar overnight chhod dein.

Neem acne ke liye ek powerful herbal medicine hai.


7. Tea Tree Oil (Diluted)

1 drop tea tree oil ko 2–3 drops carrier oil (coconut oil / almond oil) me mix karein.

Cotton bud se pimple par lagayein.

Overnight chhod dein.

👉 Direct tea tree oil use na karein, warna skin irritate ho sakti hai.

Dermatologist Recommended Overnight Treatments

Agar pimples zyada hote hain toh dermatologist approved products zyada effective hote hain.

1. Benzoyl Peroxide Gel (2.5%–5%)

Spot treatment ke liye best.

Bacteria ko kill karta hai aur pimple ko shrink karta hai.

2. Salicylic Acid Gel (2%)

Dead skin cells ko dissolve karta hai.

Whiteheads aur blackheads ke liye effective hai.

3. Retinoid Creams

Skin cell turnover fast karte hain.

Regular use se pimples aur scars dono control hote hain.

4. Hydrocolloid Pimple Patches

Yeh transparent stickers pimples ke pus aur oil ko soak kar lete hain.

Overnight swelling kam ho jaati hai.

Remedies Comparison Table

Remedy/Treatment Time Taken Best For Side Effect Risk

Ice Therapy 10–15 min Redness/Swelling Very Low
Aloe Vera Gel Overnight Sensitive Skin None
Haldi Paste 4–6 hours Bacterial Pimples Mild Stain
Honey Overnight Mild Pimples None
Neem Paste Overnight Acne & Bacteria None
Tea Tree Oil (Diluted) Overnight Oily Skin Acne Irritation if undiluted
Benzoyl Peroxide 4–6 hours Severe Pimples Dryness
Salicylic Acid Gel Overnight Whiteheads/Blackheads Mild dryness
Pimple Patch Overnight Active Pimples None

Lifestyle & Diet Tips (Future Pimples Se Bachne Ke Liye)

Har din face ko gentle cleanser se do baar dhoyein.

Heavy oily creams aur pore-clogging makeup avoid karein.

Junk food, oily snacks aur sugary drinks kam karein.

Fresh fruits, vegetables aur plenty of water consume karein.

Stress manage karein aur 7–8 ghante ki neend lein.

Pillow covers aur towels ko regular wash karein.

FAQs

Q1. Kya ek raat me pimple hatana possible hai?
👉 Completely hatana mushkil hai, lekin swelling aur redness ko 70–80% kam kiya ja sakta hai.

Q2. Kya toothpaste lagana sahi hai?
👉 Nahi! Toothpaste skin ko burn kar sakta hai aur marks chhod deta hai.

Q3. Natural remedies better hain ya creams?
👉 Mild pimples ke liye natural remedies, aur severe acne ke liye dermatologist creams best hain.

Q4. Pimple ko press karke nikalna sahi hai kya?
👉 Bilkul nahi, isse scars aur infection ho sakta hai.

Q5. Kya oily skin wale hamesha pimples face karte hain?
👉 Nahi, agar proper skincare routine follow karein toh pimples control ho sakte hain.

Q6. Acne aur pimple me difference kya hai?
👉 Acne ek medical condition hai jisme pimples, blackheads, whiteheads sab include hote hain. Pimple uska ek symptom hai.

Q7. Kya neem aur haldi ke nuskhe long term me safe hain?
👉 Haan, herbal remedies safe hain lekin har skin alag hoti hai, patch test zaroor karein.

Q8. Pimple aane par turant kya karna chahiye?
👉 Ice therapy + spot treatment sabse effective hai.

Conclusion

1 raat me pimple hatana mushkil hai, lekin swelling, redness aur size ko kam kiya ja sakta hai. Agar aap mild pimples face kar rahe hain toh home remedies jaise ice, aloe vera, honey aur neem paste try karein. Severe acne ya frequent pimples ke case me dermatologist ke prescribed creams (benzoyl peroxide, salicylic acid) ya pimple patches best hain.

👉 Remember: Prevention is better than cure. Healthy diet, skincare aur lifestyle changes se pimples ko long term ke liye control kiya ja sakta hai.

Anti-Ageing Cream के प्रमुख फायदे

1. झुर्रियों और Fine Lines को कम करना

Anti-ageing creams में रेटिनॉल, पेप्टाइड्स और हायल्यूरोनिक एसिड जैसे सक्रिय तत्व होते हैं, जो कोलेजन प्रोडक्शन को बढ़ाते हैं।

इससे स्किन टाइट होती है और झुर्रियों की गहराई कम हो जाती है।

"Anti-ageing cream benefits for youthful and glowing skin - Skincare tips"

Anti-Ageing Cream क्या है?

Anti-Ageing Cream एक ऐसी cosmetic formulation है जो खासतौर पर स्किन की एजिंग के संकेतों को कम करने और त्वचा को यंग बनाए रखने के लिए बनाई जाती है। इनमें आमतौर पर ये ingredients पाए जाते हैं:

Retinol (Vitamin A) – कोलेजन प्रोडक्शन बढ़ाने के लिए

Vitamin C – एंटीऑक्सीडेंट और ब्राइटनिंग

Hyaluronic Acid – डीप हाइड्रेशन

Peptides – स्किन टाइटनिंग

Niacinamide – Pigmentation और Uneven Skin Tone सुधारने के लिए

SPF – सन डैमेज से बचाने के लिए "Anti-ageing cream benefits for youthful and glowing skin - Skincare tips"

Anti-Ageing Cream के प्रमुख फायदे

1. झुर्रियों और Fine Lines को कम करना

Anti-Ageing Cream में मौजूद Retinol और Peptides स्किन सेल्स को रिपेयर करते हैं।

ये कोलेजन और इलास्टिन का उत्पादन बढ़ाते हैं, जिससे झुर्रियाँ और fine lines कम दिखाई देते हैं।

रेगुलर उपयोग से स्किन ज्यादा टाइट और स्मूद हो जाती है।

2. स्किन की Firmness और Tightness बढ़ाना

उम्र बढ़ने के साथ स्किन की इलास्टिसिटी कम हो जाती है।

Anti-Ageing Cream में मौजूद Collagen boosters स्किन को फर्म और टाइट बनाते हैं।

चेहरा ज्यादा youthful और defined दिखाई देता है।

3. Uneven Skin Tone और Pigmentation को सुधारना

Sun exposure और pollution के कारण डार्क स्पॉट्स, पिगमेंटेशन और Uneven Tone की समस्या बढ़ जाती है।

Anti-Ageing Cream में मौजूद Vitamin C और Niacinamide इन समस्याओं को दूर करते हैं।

रिज़ल्ट – स्किन ब्राइट और क्लियर दिखती है।

4. डीप हाइड्रेशन और Nourishment

Dehydration स्किन एजिंग का सबसे बड़ा कारण है।

Anti-Ageing Cream में Hyaluronic Acid, Shea Butter और Natural Oils होते हैं जो स्किन को लंबे समय तक हाइड्रेट रखते हैं।

इससे स्किन प्लंप और ग्लोइंग दिखती है।

5. Sun Damage Repair और Protection

UV Rays स्किन को समय से पहले बूढ़ा कर देती हैं।

अच्छी Anti-Ageing Creams में SPF और Antioxidants होते हैं, जो स्किन को सन डैमेज से बचाते हैं।

ये existing डैमेज को रिपेयर करने और नई हानि से रोकने में मदद करते हैं।

6. Youthful Glow बनाए रखना

Anti-Ageing Creams न सिर्फ wrinkles को कम करती हैं बल्कि स्किन को Healthy Glow भी देती हैं।

स्किन cells की regeneration fast होती है और dullness कम हो जाती है।

7. Dark Circles और Puffy Eyes में राहत

कई Anti-Ageing formulations खासतौर पर eye care के लिए भी होते हैं।

इनमें Caffeine और Peptides होते हैं जो dark circles और puffiness को कम करते हैं।

8. स्किन को Smooth और Soft बनाना

नियमित उपयोग से स्किन का texture बेहतर होता है।

Roughness और dryness खत्म होकर चेहरा silky smooth लगता है।

https://cosmeticgyaan.com/what-is-hyaluronic-acid/

Anti-Ageing Cream इस्तेमाल करने का सही तरीका

1. क्लीनिंग: चेहरे को mild cleanser से धो लें।

2. टोनिंग: गुलाबजल या toner से पोर्स को टाइट करें।

3. Anti-Ageing Cream: मटर के दाने जितनी मात्रा लेकर पूरे चेहरे और गर्दन पर upward motion में लगाएं।

4. सनस्क्रीन: अगर दिन का समय है तो उसके ऊपर SPF लगाना न भूलें।


💡 Note: रात को सोने से पहले Anti-Ageing Cream का इस्तेमाल सबसे अच्छा माना जाता है, क्योंकि रात में स्किन repair mode में होती है।

कौन-कौन लोग Anti-Ageing Cream का इस्तेमाल करें?

28-30 साल की उम्र के बाद हर कोई इसे इस्तेमाल कर सकता है।

जिन्हें wrinkles, fine lines, pigmentation या dryness की समस्या है।

जो लोग ज्यादा धूप या pollution के संपर्क में रहते हैं।

Side Effects (ध्यान देने योग्य बातें)

हर स्किन टाइप अलग होता है, इसलिए शुरुआत में patch test करें।

Retinol वाली क्रीम शुरुआती दिनों में हल्की जलन या dryness दे सकती है।

Sensitive skin वालों को dermatologist से सलाह लेनी चाहिए।

नेचुरल विकल्प

अगर आप chemical-based products से बचना चाहते हैं तो ये natural anti-ageing remedies भी काम करती हैं:

Aloe Vera Gel – hydration और soothing

Coconut Oil – nourishment और softness

Honey + Lemon Pack – glow और pigmentation control

Green Tea Extract – antioxidant protection

निष्कर्ष

Anti-Ageing Cream सिर्फ एक cosmetic product नहीं है, बल्कि यह आपकी स्किन के लिए एक long-term investment है। यह न केवल झुर्रियों और fine lines को कम करती है, बल्कि स्किन को hydrate, nourishtk और protect भी करती है।

अगर आप चाहते हैं कि आपकी स्किन लंबे समय तक यंग, हेल्दी और ग्लोइंग दिखे, तो अपनी स्किनकेयर रूटीन में Anti-Ageing Cream को ज़रूर शामिल करें।